
When installing siding, choosing the right fasteners is just as important as selecting the siding material. Siding nails play a crucial role in securing the siding to your home, ensuring it stays in place and performs effectively over time. But what exactly are siding nails, and why are they important? In this article, we’ll explore what siding nails are, the different types available, and how to choose the right ones for your project.
1. What Are Siding Nails?
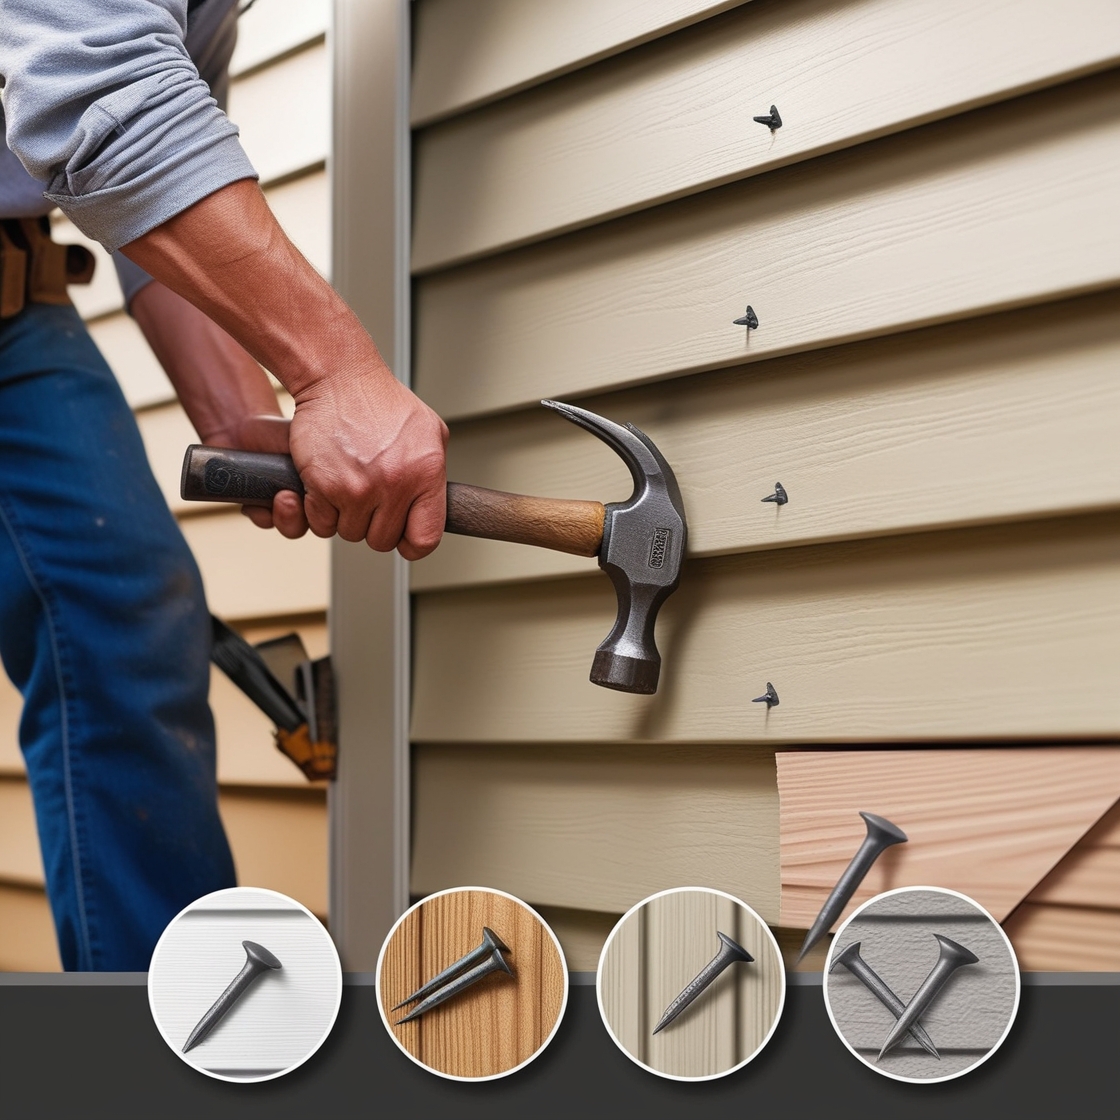
Siding nails are a type of fastener specifically designed for attaching siding materials to the exterior walls of a home. They are engineered to provide a strong, secure hold while allowing for the natural expansion and contraction of siding materials due to temperature changes. Unlike regular nails, siding nails are made to withstand the unique demands of outdoor conditions, such as moisture, wind, and temperature fluctuations.
2. Features of Siding Nails
Siding nails have several distinct features that set them apart from other types of nails:
- Length: Siding nails are generally longer than standard nails, ranging from 1.25 inches to 2.5 inches in length. The length of the nail is crucial for ensuring it penetrates both the siding material and the underlying wall structure, providing a secure hold.
- Diameter: Siding nails have a thinner shank than other nails, which reduces the risk of splitting the siding material during installation. The smaller diameter also helps the nail penetrate the siding more easily.
- Head Design: The head of a siding nail is typically flat and slightly larger than the shank, providing a larger surface area to hold the siding in place. Some siding nails have a ring or spiral shank, which increases the holding power and prevents the nail from backing out over time.
- Corrosion Resistance: Since siding nails are exposed to the elements, they are often made from corrosion-resistant materials, such as stainless steel or galvanized steel. This helps prevent rusting and ensures the nails maintain their strength and appearance over time.
3. Types of Siding Nails
There are several types of siding nails, each suited to different materials and installation methods:
- Galvanized Siding Nails: These are the most common type of siding nails, coated with a layer of zinc to prevent rust and corrosion. They are ideal for most siding materials, including wood, vinyl, and fiber cement. Galvanized nails are available in both smooth and ring-shank designs, with the latter offering greater holding power.
- Stainless Steel Siding Nails: Stainless steel nails are highly resistant to corrosion, making them an excellent choice for coastal areas or regions with high humidity. They are typically used for wood siding, such as cedar or redwood, where rust stains would be particularly noticeable.
- Aluminum Siding Nails: Aluminum nails are lightweight and resistant to rust, making them suitable for use with aluminum and vinyl siding. However, they are not as strong as steel nails and may not be the best choice for heavy or dense siding materials.
- Hot-Dipped Galvanized Nails: These nails undergo a process in which they are dipped in molten zinc, resulting in a thicker, more durable coating than standard galvanized nails. Hot-dipped galvanized nails are ideal for fiber cement siding, which requires a strong, rust-resistant fastener.
4. How to Choose the Right Siding Nails
Selecting the right siding nails depends on several factors, including the siding material, climate, and specific installation requirements:
- Material Compatibility: Ensure the nails are compatible with the siding material you’re using. For example, stainless steel or hot-dipped galvanized nails are recommended for fiber cement siding, while aluminum nails are best for aluminum siding.
- Climate Considerations: In coastal or humid environments, choose corrosion-resistant nails, such as stainless steel, to prevent rust and staining. In areas with extreme weather conditions, opt for nails with greater holding power, like ring-shank or spiral-shank nails.
- Nail Length: The length of the nail should be sufficient to penetrate the siding and at least 1 inch into the underlying structure. For thicker siding materials, longer nails may be required to ensure a secure hold.
- Installation Method: If you’re using a nail gun, make sure the nails are compatible with your equipment. Nail guns typically require specific types of nails, such as coil nails, which are designed for use in pneumatic tools.
5. Installation Tips
Proper installation of siding nails is essential for ensuring the longevity and performance of your siding:
- Nail Placement: Nails should be placed in the center of the nailing strip or slot provided on the siding panel. Avoid placing nails too close to the edges, as this can cause the material to crack or split.
- Nail Depth: Do not drive nails too tightly against the siding. Siding needs room to expand and contract with temperature changes, so leave a small gap between the nail head and the siding surface. Overdriving nails can lead to buckling or warping.
- Spacing: Follow the manufacturer’s guidelines for nail spacing, which typically range from 12 to 16 inches apart. Proper spacing ensures the siding is securely attached and can withstand wind and other environmental forces.